Tutorial: Magic Yarn Ball
I have a gigantic mountain of yarn tidbits from previous projects that I can’t stand to see wasted. It’s been sitting and growing amongst my stash and I have been hoping for a way to use it up. Problem is, I hate weaving in ends...like really, really hate it. I avoid projects with large numbers of yarn ends to weave in, and had tried the “magic knot” but was underwhelmed by the bumps it left in my work. It seemed these odd bits of memory infused yarn from previous projects were destined for a lonely life in their color coded ziploc bags (at least I am an organized hoarder). Then, I learned the Russian Join and made my first “magic yarn ball”. Suddenly I am excited by all my leftovers, knowing I don’t have to weave in ends or contend with knots.

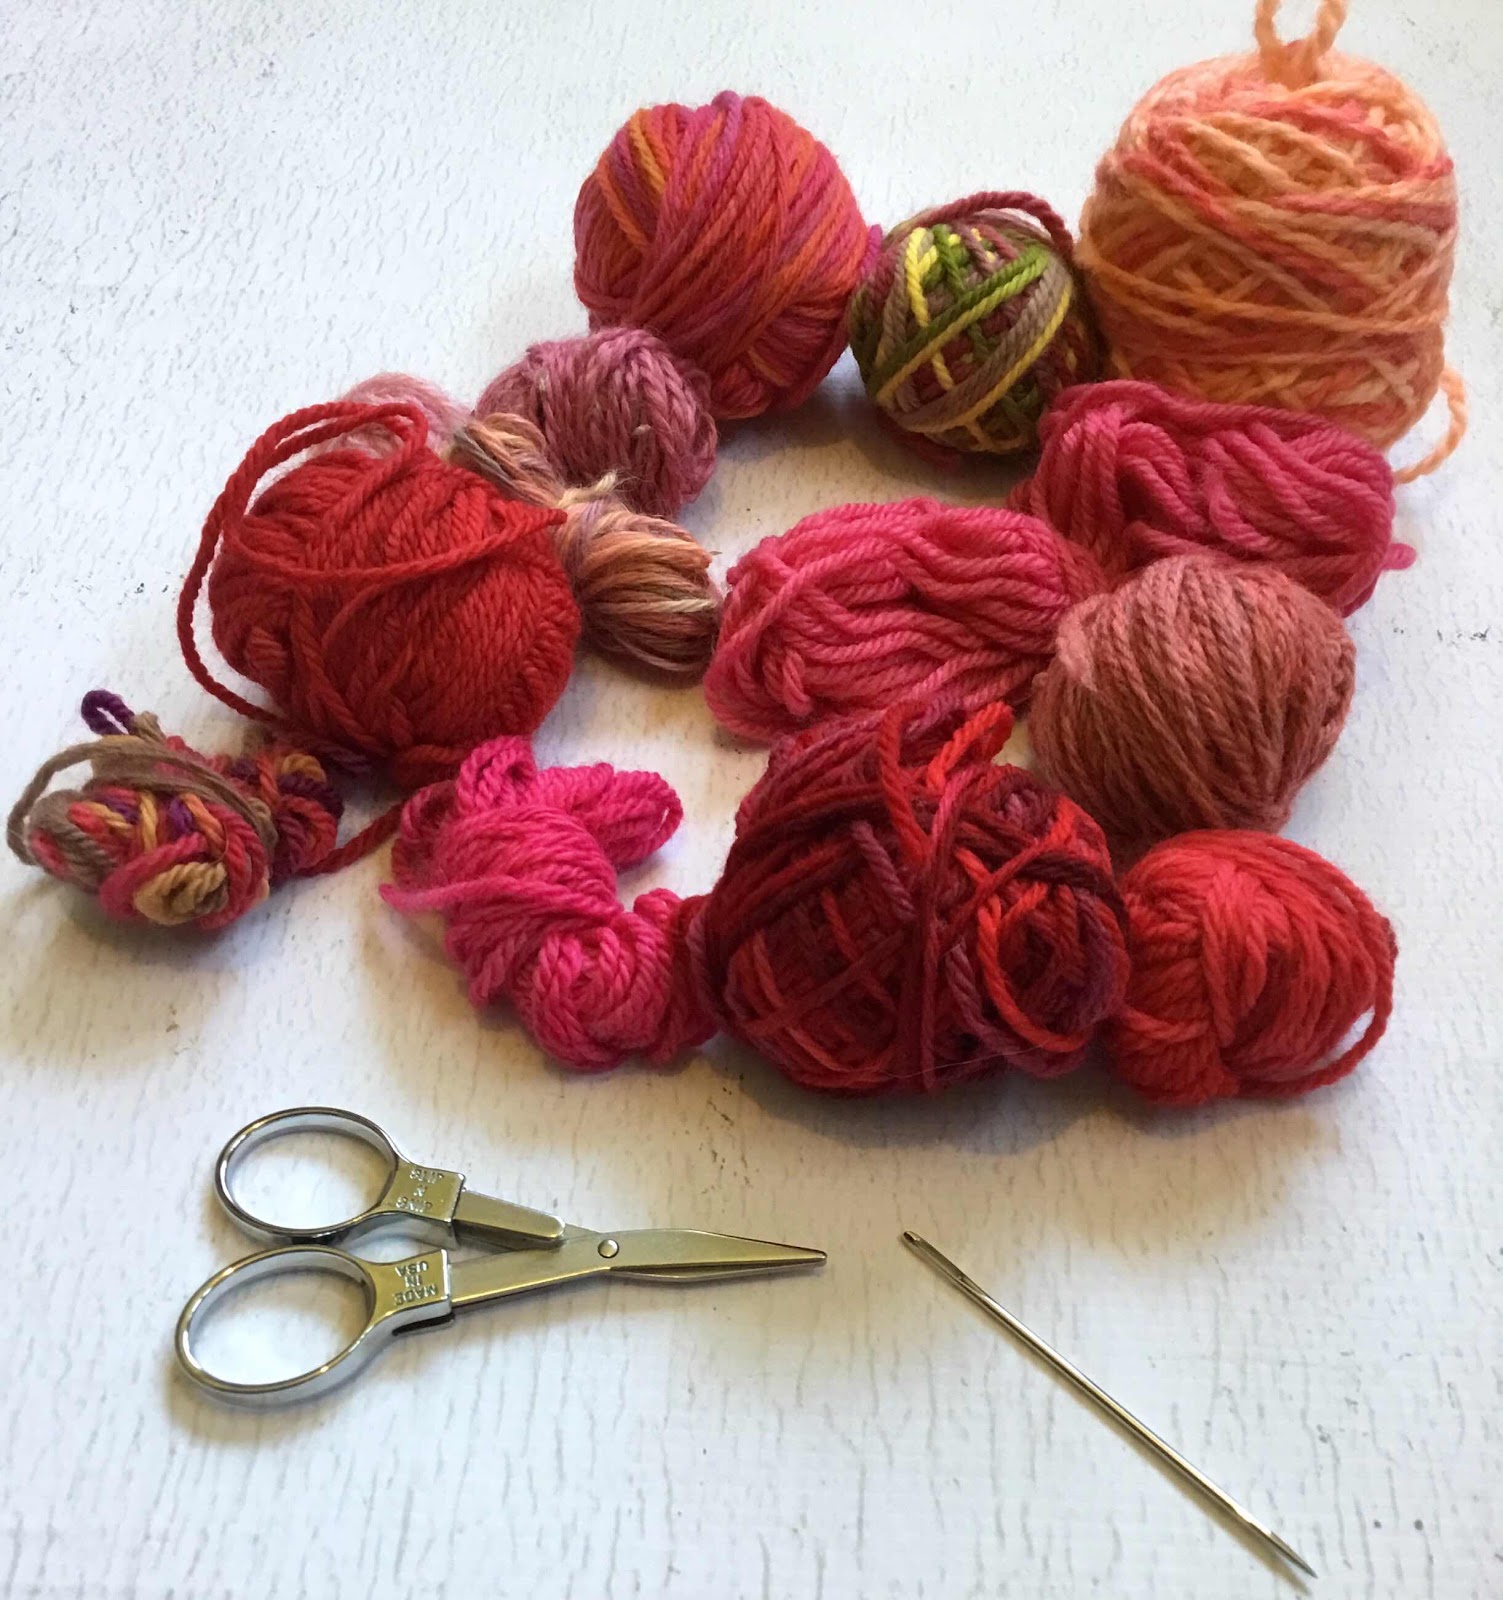
I thought I’d share a little tutorial if you’d like to make your own! Here are the supplies you’ll need: a tapestry needle with a pointy end, scissors and yarn leftovers.
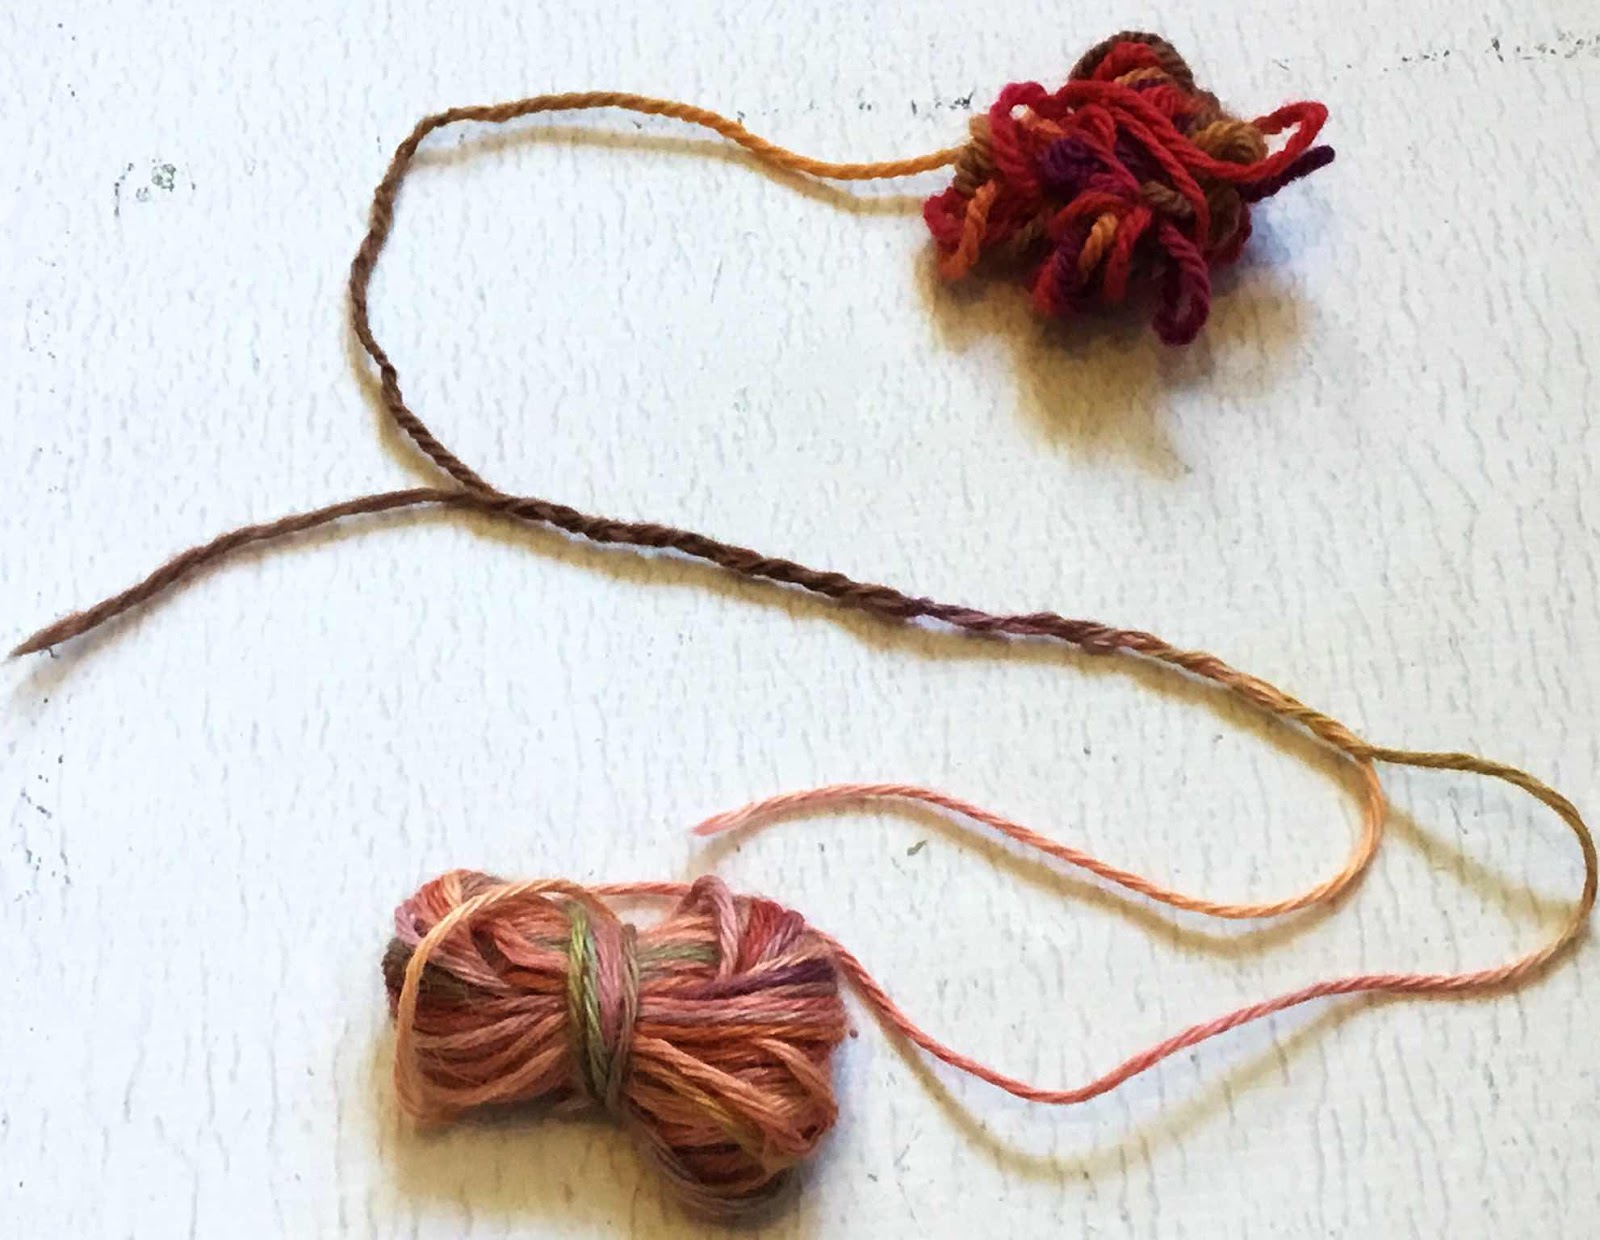
Step 3: Now, take the next yarn you want to use and thread it through the tapestry needle. Pass the needle through the loop from your first yarn as shown here.

Step 4: Next, make 10-12 running stitches in your new yarn, as shown. You will be attaching your new yarn to the loop made in Step 3.

Step 6: Trim the yarn tails, revealing your continuous yarn! Roll the yarn you just joined onto your ball.
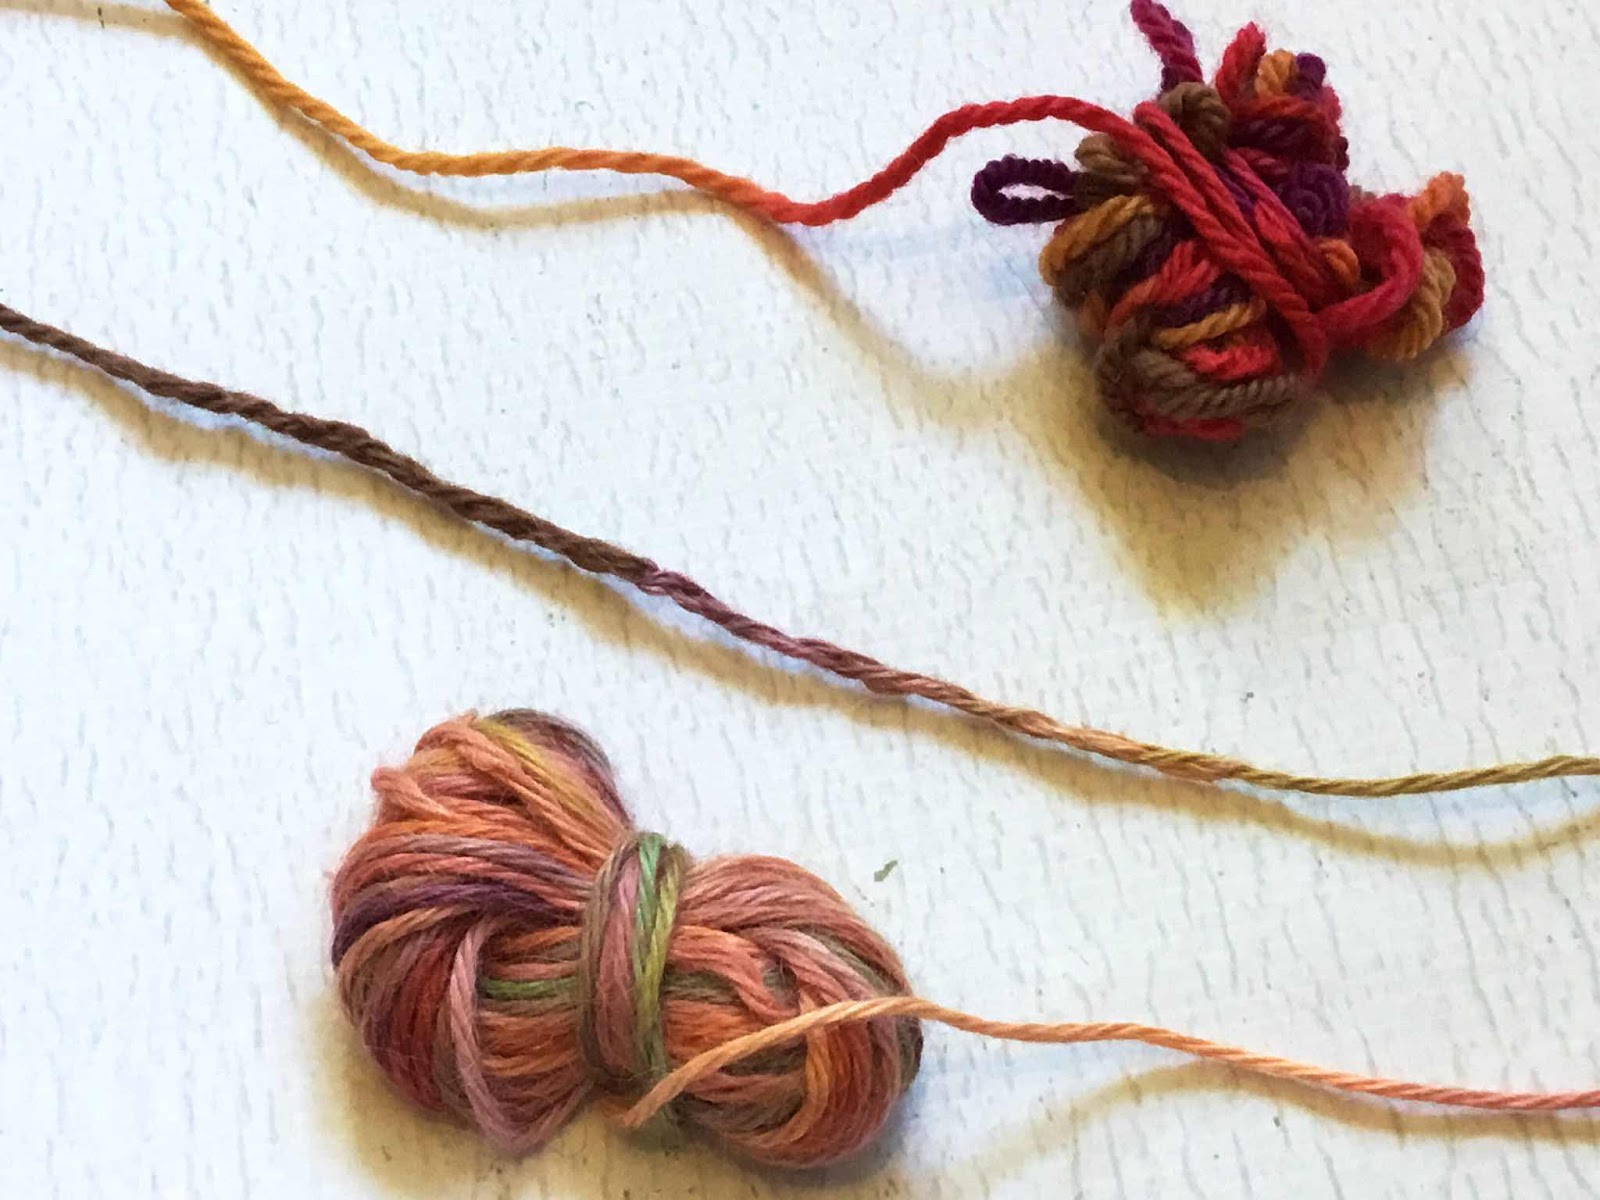
Repeat Steps 1-6 until your yarn ball is as big as you want it or you run out of scraps. The photo below shows the next Steps 1-3 of my ball. Vary the length of your scraps as you wish for the project you have in mind. For example, I wanted to make a top-down crochet hat from my first yarn ball, so I made sure that the end I started from had shorter lengths of yarn to account for the increasing number of stitches in the crown of the hat. Then, I used longer segments of yarn scraps for the body of the hat since there are more stitches being worked there. This gave my hat a somewhat even striped effect. Of course, you could follow the lead of your scraps, making your ball totally random as I did in this tutorial ball!

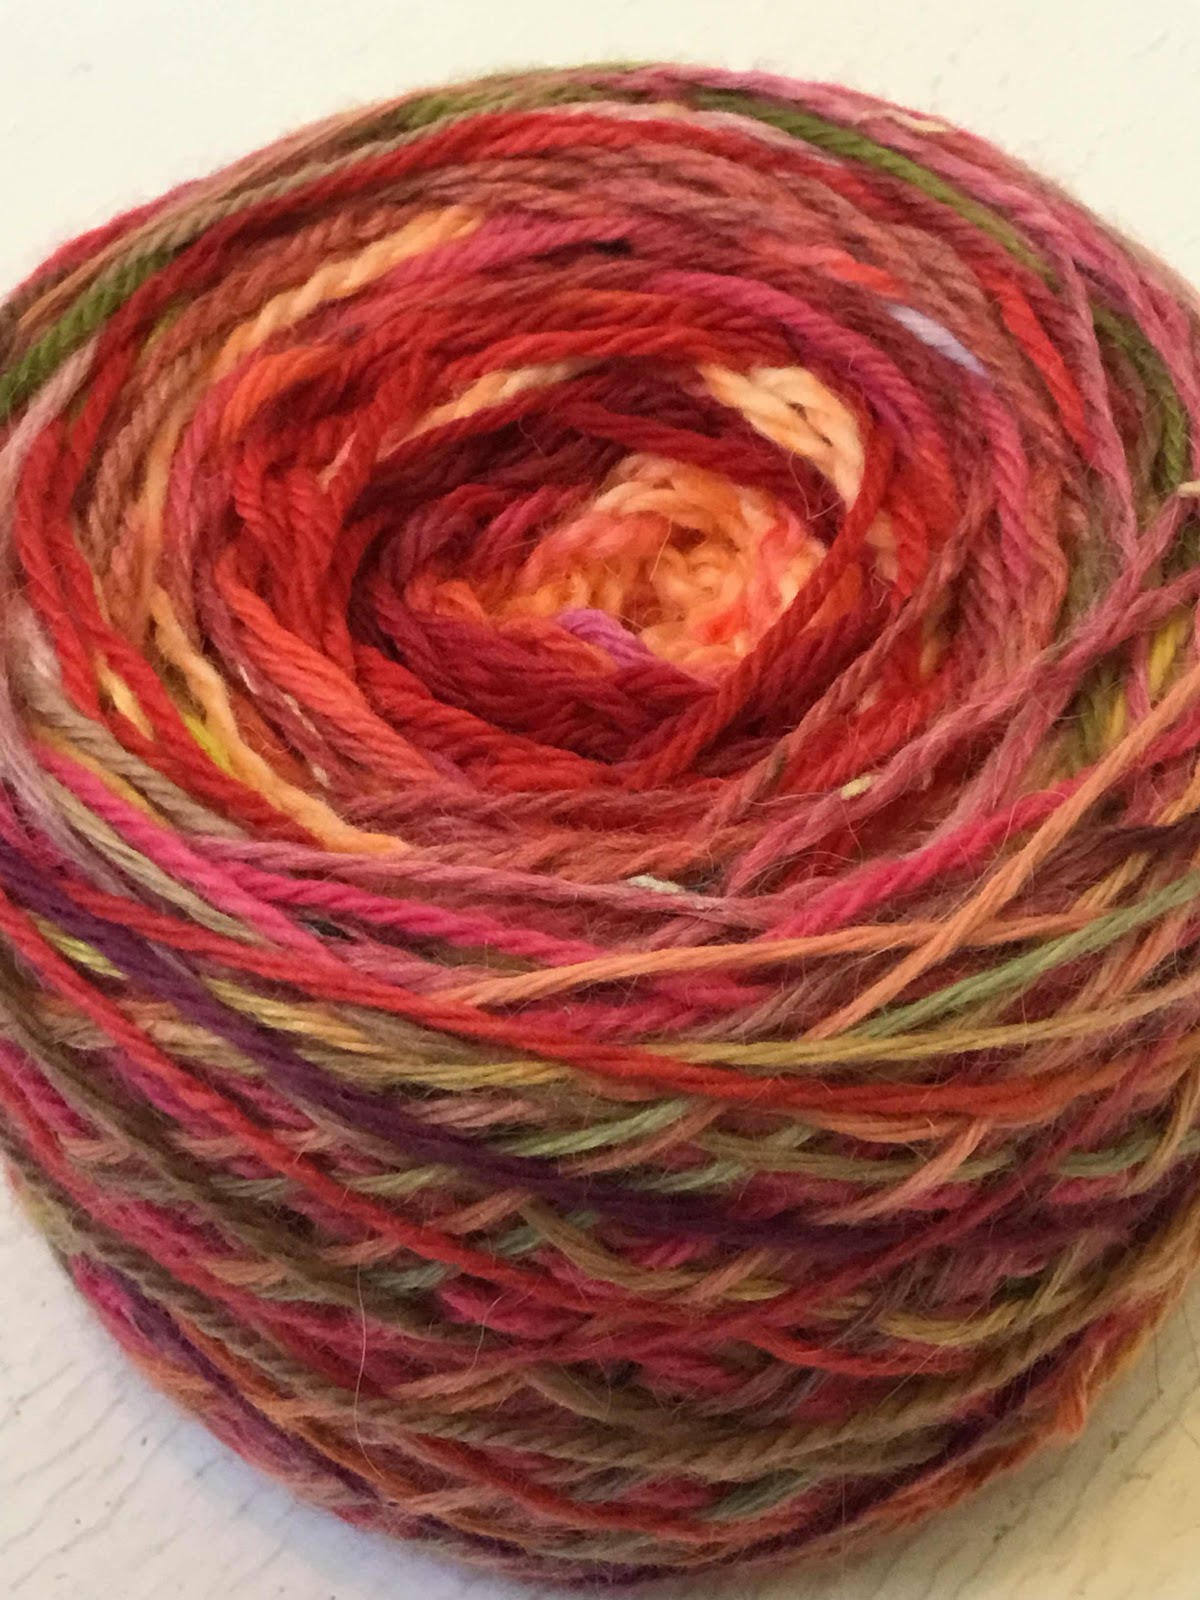
I made this ball 150 grams because I plan to crochet a cowl from it.

I hope I’ve inspired you to give new life to all those yarn scraps I’m sure you have! Let me know if you have any questions. :-)
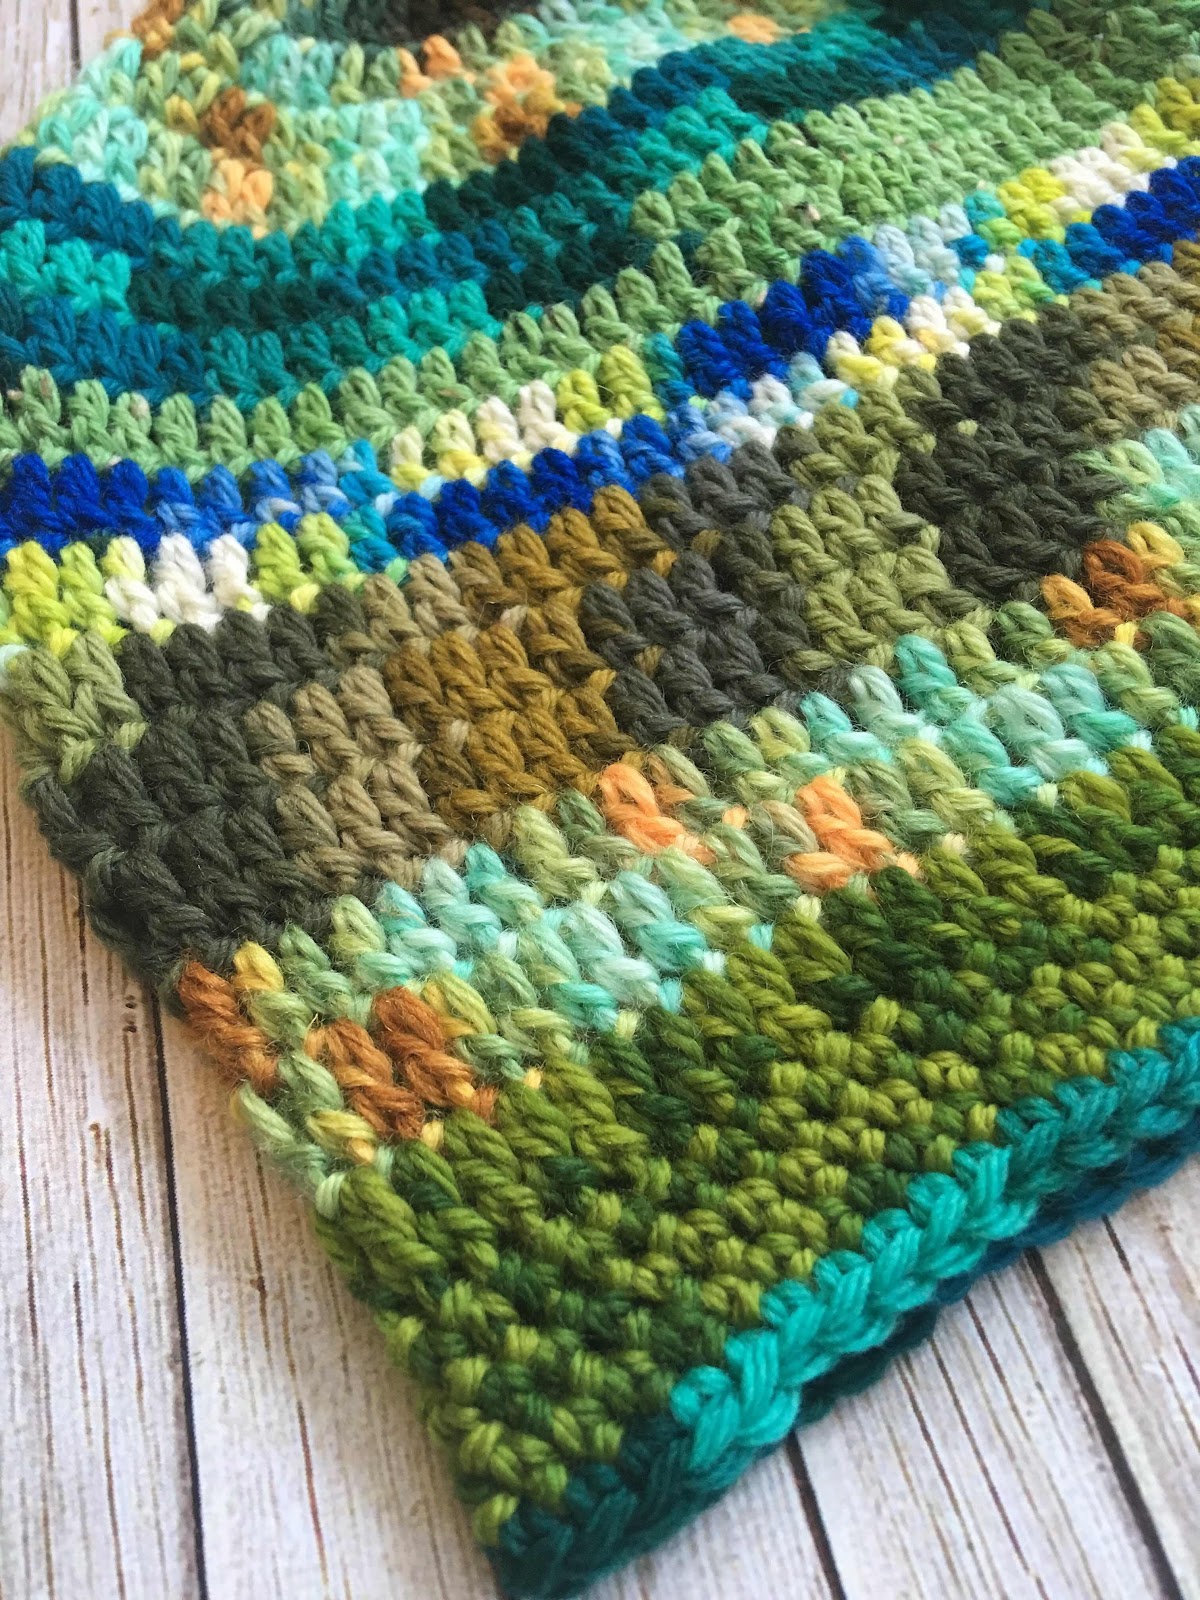
The hat I made from my first magic ball
I thought I’d share a little tutorial if you’d like to make your own! Here are the supplies you’ll need: a tapestry needle with a pointy end, scissors and yarn leftovers.
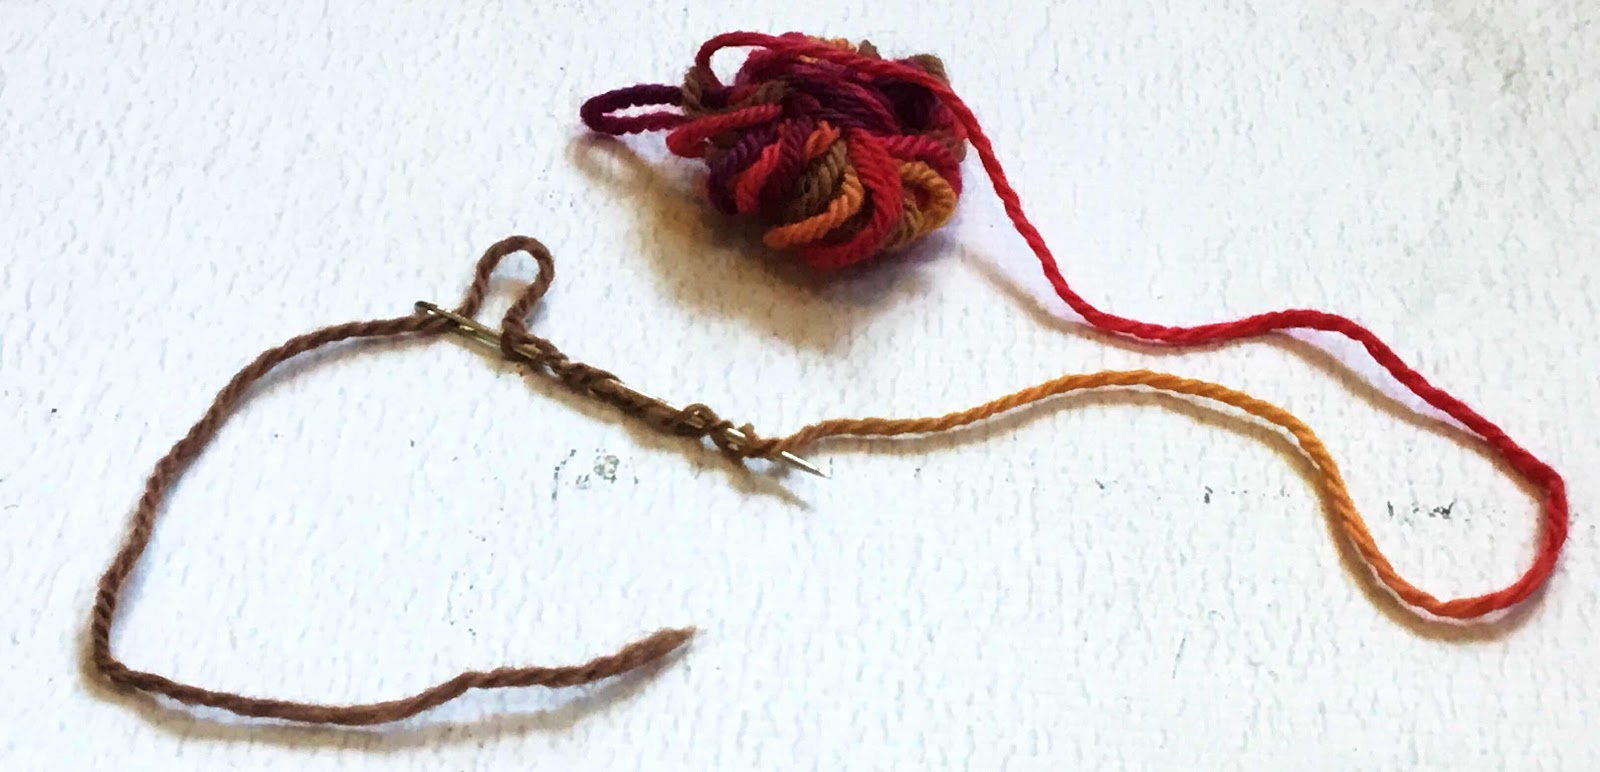
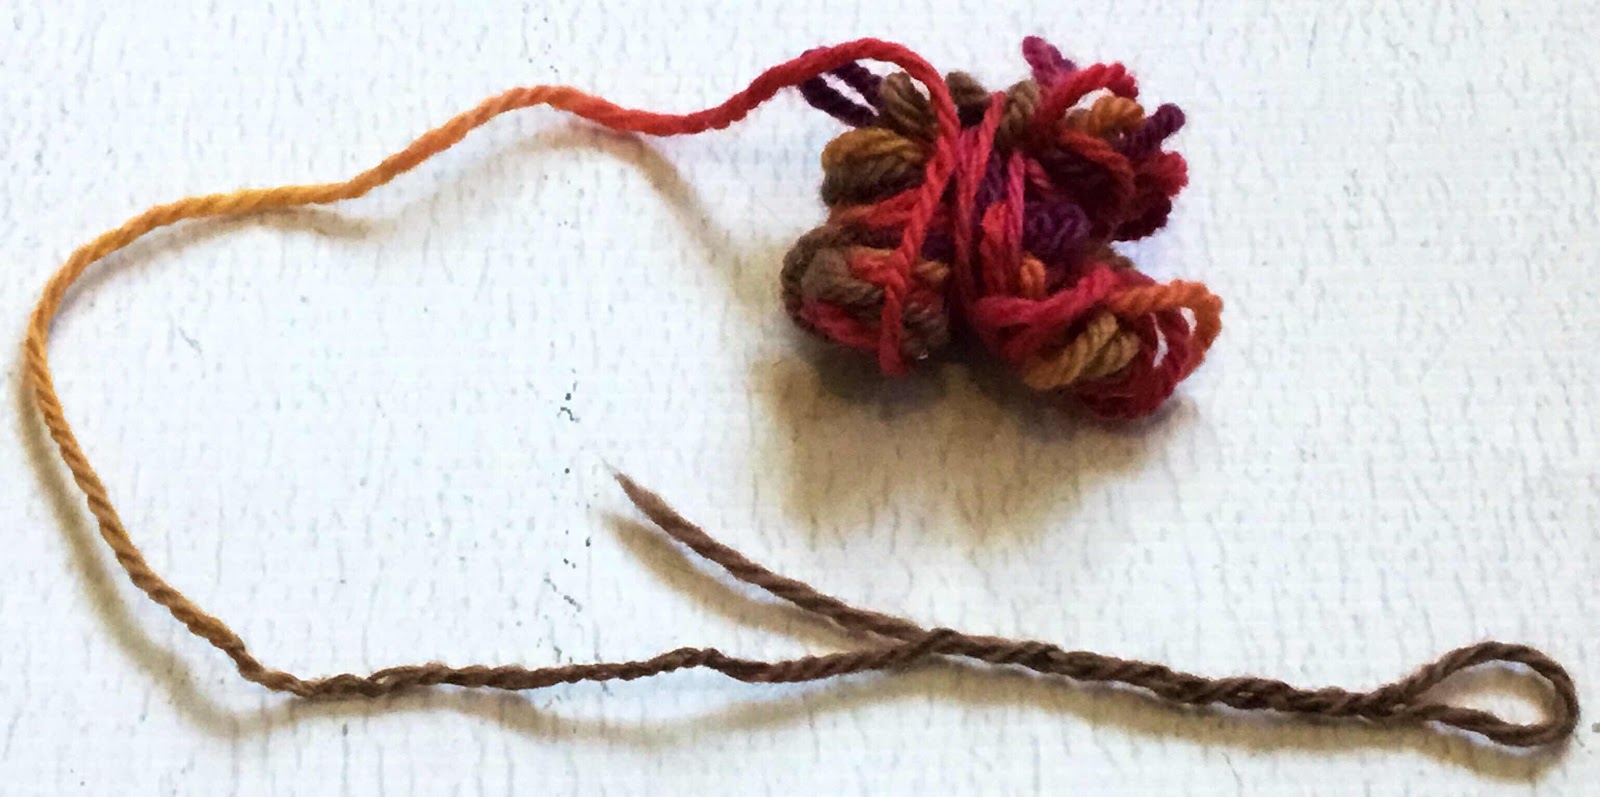
Step 1: First, thread your needle with your first yarn scrap and make about 10-12 running stitches through the yarn with your needle. I just poked the needle through willy nilly without caring too much about making the stitches even. Other methods for the Russian Join tell you to just slide the needle between the plies, but I had no luck. The running stitch helps tack down the join and looks just fine in my opinion.
Step 2: Next, pull on the tail end of the yarn above the needle until you get a loop as shown on the right hand side of the picture. Holding onto this loop, use the needle to pull the tail through the running stitches you made. Don’t let the loop slip through...you’ll need it for the next step.
Here’s how it should look.
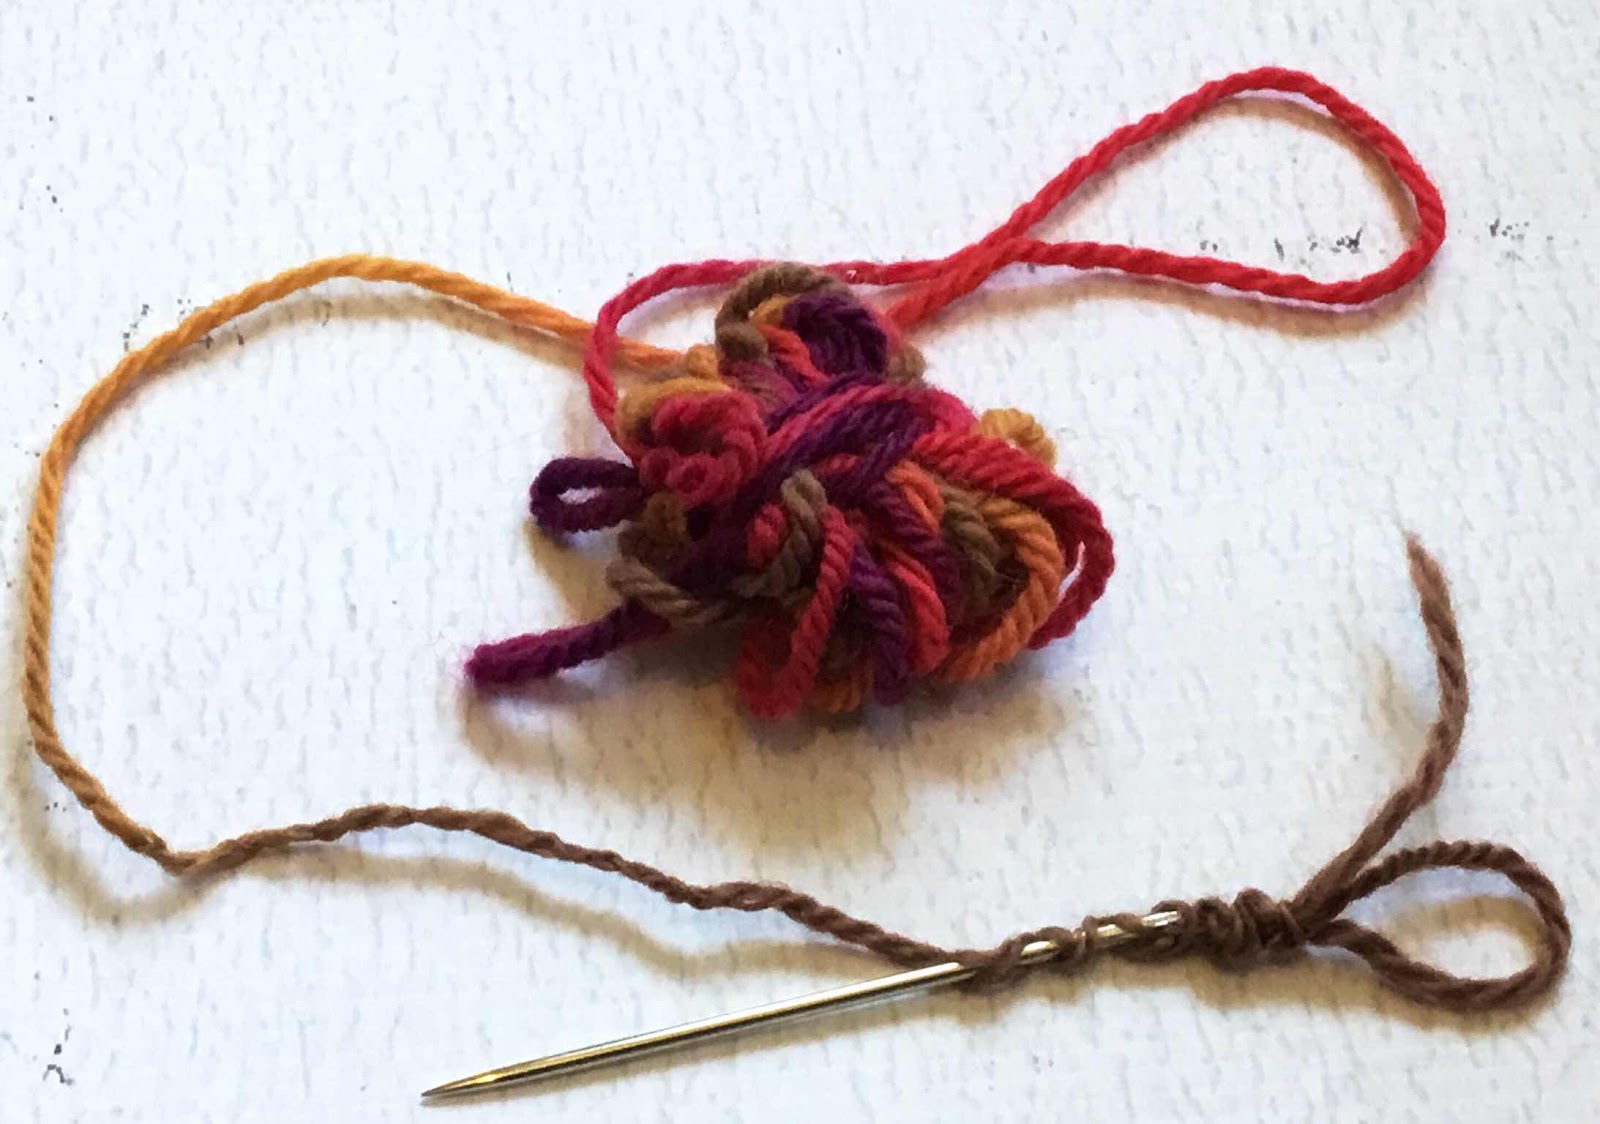
Step 3: Now, take the next yarn you want to use and thread it through the tapestry needle. Pass the needle through the loop from your first yarn as shown here.
Step 4: Next, make 10-12 running stitches in your new yarn, as shown. You will be attaching your new yarn to the loop made in Step 3.
Step 5: Pull the needle through the running stitches and pull on the tails of both yarns to close up the loops. Smooth out your yarn so the join is seamless.
Step 6: Trim the yarn tails, revealing your continuous yarn! Roll the yarn you just joined onto your ball.
Repeat Steps 1-6 until your yarn ball is as big as you want it or you run out of scraps. The photo below shows the next Steps 1-3 of my ball. Vary the length of your scraps as you wish for the project you have in mind. For example, I wanted to make a top-down crochet hat from my first yarn ball, so I made sure that the end I started from had shorter lengths of yarn to account for the increasing number of stitches in the crown of the hat. Then, I used longer segments of yarn scraps for the body of the hat since there are more stitches being worked there. This gave my hat a somewhat even striped effect. Of course, you could follow the lead of your scraps, making your ball totally random as I did in this tutorial ball!
I made this ball 150 grams because I plan to crochet a cowl from it.
I wound it into a cake after because I wanted to see all the pretty colors!
I hope I’ve inspired you to give new life to all those yarn scraps I’m sure you have! Let me know if you have any questions. :-)
Comments
Post a Comment